
There’s something undeniably magical about biting into a freshly baked Panera orange scone. The perfect balance of citrusy zest and sweet, crumbly texture makes it a breakfast treat worth savoring. But what if you could recreate this bakery favorite in your own kitchen? In this article, we’ll dive into everything you need to know about making Panera orange scones at home. From the history of scones to step-by-step instructions, glazing tips, and even FAQs, this guide has it all. Whether you’re a seasoned baker or a newbie, you’ll find plenty of inspiration to whip up a batch of these delightful pastries. So, roll up your sleeves, preheat your oven, and let’s get started!
Introduction to Panera’s Orange Scones
What Makes Panera’s Orange Scones So Special?
Panera Bread has built a reputation for crafting baked goods that feel both indulgent and wholesome. Their orange scones are no exception. What sets them apart is the bold citrus flavor that shines through in every bite. The zesty orange glaze, the tender crumb, and the slight crunch on the edges create a symphony of textures and tastes. It’s no wonder these scones have become a fan favorite, often selling out early in the day.
But it’s not just about the flavor. Panera’s scones strike the perfect balance between sweet and tangy, making them versatile enough for breakfast, an afternoon snack, or even dessert. Plus, their portable size makes them a convenient treat for busy mornings or on-the-go moments.
Why Bake Your Own Orange Scones?
While picking up a scone from Panera is easy, there’s something deeply satisfying about baking your own. For starters, you can customize the recipe to suit your preferences. Want a stronger orange flavor? Add extra zest. Prefer a sweeter glaze? Adjust the sugar ratio. The possibilities are endless.
Moreover, baking at home allows you to control the quality of ingredients. You can opt for organic flour, fresh farm eggs, and locally sourced oranges to create a truly artisanal treat. And let’s not forget the joy of filling your home with the irresistible aroma of freshly baked scones. It’s an experience that store-bought pastries simply can’t match.
So, whether you’re looking to impress guests, treat yourself, or simply try your hand at a new recipe, making Panera orange scones at home is a rewarding endeavor. Stay tuned as we explore the history, ingredients, and step-by-step process to help you master this delightful recipe!
The History and Popularity of Orange Scones
The Origins of Scones: A Brief History
Scones have a rich history that dates back centuries. Originally from Scotland, these baked goods were simple, round cakes made with oats and cooked on a griddle. Over time, they evolved into the flaky, buttery treats we know today. By the 19th century, scones became a staple of British afternoon tea, often served with clotted cream and jam.
Interestingly, the name “scone” is believed to have come from the Dutch word schoonbrot, meaning “beautiful bread.” As scones gained popularity, they spread across the globe, with each culture adding its own twist. In America, for instance, scones became sweeter and more decadent, often featuring fruits, nuts, and glazes.
How Panera Revolutionized the Classic Scone
When Panera Bread introduced their orange scone recipe, they took the classic scone to a whole new level. By infusing the dough with fresh orange zest and topping it with a tangy glaze, they created a pastry that’s both refreshing and indulgent. What’s more, Panera’s scones are known for their perfect texture—crispy on the outside, yet soft and tender on the inside.
Panera’s success lies in their ability to balance tradition with innovation. While they honor the scone’s British roots, they’ve adapted it to suit modern tastes. Their orange scones are a prime example of how a simple recipe can be transformed into something extraordinary.
Why Orange Scones Are a Breakfast Staple
Orange scones have become a breakfast favorite for good reason. Their bright citrus flavor wakes up the senses, making them an ideal companion to your morning coffee or tea. Plus, they’re versatile enough to pair with a variety of spreads, from butter to marmalade.
What’s more, scones are incredibly convenient. They’re easy to grab on busy mornings, and their sturdy texture makes them perfect for packing in lunchboxes or picnic baskets. Whether you’re enjoying them at home or on the go, Panera orange scones are a delicious way to start your day.

Ingredients for the Perfect Panera-Style Orange Scone
Essential Ingredients You’ll Need
To recreate the magic of Panera orange scones at home, you’ll need a handful of basic ingredients. First and foremost, fresh oranges are key. Their zest and juice provide the vibrant citrus flavor that defines these scones. You’ll also need all-purpose flour, sugar, butter, and eggs to create the dough.
Don’t forget baking powder, which gives the scones their signature rise. A pinch of salt enhances the flavors, while a splash of milk or cream adds richness. These simple ingredients come together to create a pastry that’s both flavorful and satisfying.
Optional Add-Ins for Extra Flavor
While the classic Panera orange scone recipe is delicious on its own, you can easily customize it with a few extra ingredients. For instance, dried cranberries add a sweet-tart contrast to the citrusy dough. White chocolate chips, on the other hand, bring a creamy richness that pairs beautifully with the orange flavor.
If you’re feeling adventurous, try adding a hint of vanilla or almond extract to the dough. These subtle flavors can elevate your scones to a whole new level. The beauty of baking at home is that you can experiment and make the recipe your own.
Choosing the Right Tools and Equipment
Having the right tools on hand can make the baking process much easier. Start with a large mixing bowl for combining your ingredients. A pastry cutter or food processor is ideal for cutting the butter into the flour, ensuring a flaky texture.
You’ll also need a baking sheet lined with parchment paper to prevent sticking. A sharp knife or bench scraper is handy for cutting the dough into triangles, while a pastry brush can be used to apply an egg wash for a golden finish. With these tools at your disposal, you’ll be well-equipped to tackle the Panera orange scone recipe like a pro.
How To Make Panera Orange Scones
Preparing the Dough: Tips for Perfect Consistency
The key to perfect Panera orange scones lies in the dough. Start by whisking together your dry ingredients—flour, sugar, baking powder, and salt—in a large bowl. Next, cut cold butter into small cubes and add it to the flour mixture. Using a pastry cutter or your fingertips, work the butter into the flour until the mixture resembles coarse crumbs. This step is crucial for achieving that flaky, tender texture.
Once the butter is incorporated, it’s time to add the wet ingredients. In a separate bowl, whisk together eggs, fresh orange juice, and a splash of milk or cream. Gradually pour this mixture into the dry ingredients, stirring gently until the dough just comes together. Be careful not to overmix, as this can make the scones tough.
Incorporating the Orange Flavor
The star of this Panera orange scone recipe is, of course, the orange flavor. To maximize the citrusy goodness, zest one or two oranges directly into the dough. The zest contains essential oils that pack a punch of flavor, so don’t skimp on it! If you want an extra burst of orange, you can also add a tablespoon or two of fresh orange juice to the wet ingredients.
As you mix the dough, you’ll notice the bright aroma of oranges filling your kitchen. This is a good sign—it means your scones are on track to be as flavorful as Panera’s.
Shaping and Cutting the Scones
Once your dough is ready, turn it out onto a lightly floured surface. Gently knead it a few times to bring it together, then pat it into a circle about 1 inch thick. Using a sharp knife or bench scraper, cut the circle into 8 equal wedges, like you’re slicing a pizza.
If you prefer smaller scones, you can cut the dough into 12 wedges instead. Alternatively, you can use a round cookie cutter to create traditional round scones. Whatever shape you choose, make sure the pieces are evenly sized so they bake uniformly.
Baking to Perfection: Time and Temperature
Preheat your oven to 400°F (200°C) and line a baking sheet with parchment paper. Arrange the scone wedges on the sheet, leaving about an inch of space between them. This allows for even airflow and ensures they bake evenly.
Before popping them in the oven, brush the tops of the scones with a little milk or an egg wash. This will give them a beautiful golden-brown crust. Bake for 15-18 minutes, or until the edges are lightly golden and a toothpick inserted into the center comes out clean.
As the scones bake, your kitchen will fill with the irresistible scent of citrus and butter. It’s hard to resist sneaking a peek, but try to keep the oven door closed as much as possible to maintain the temperature.
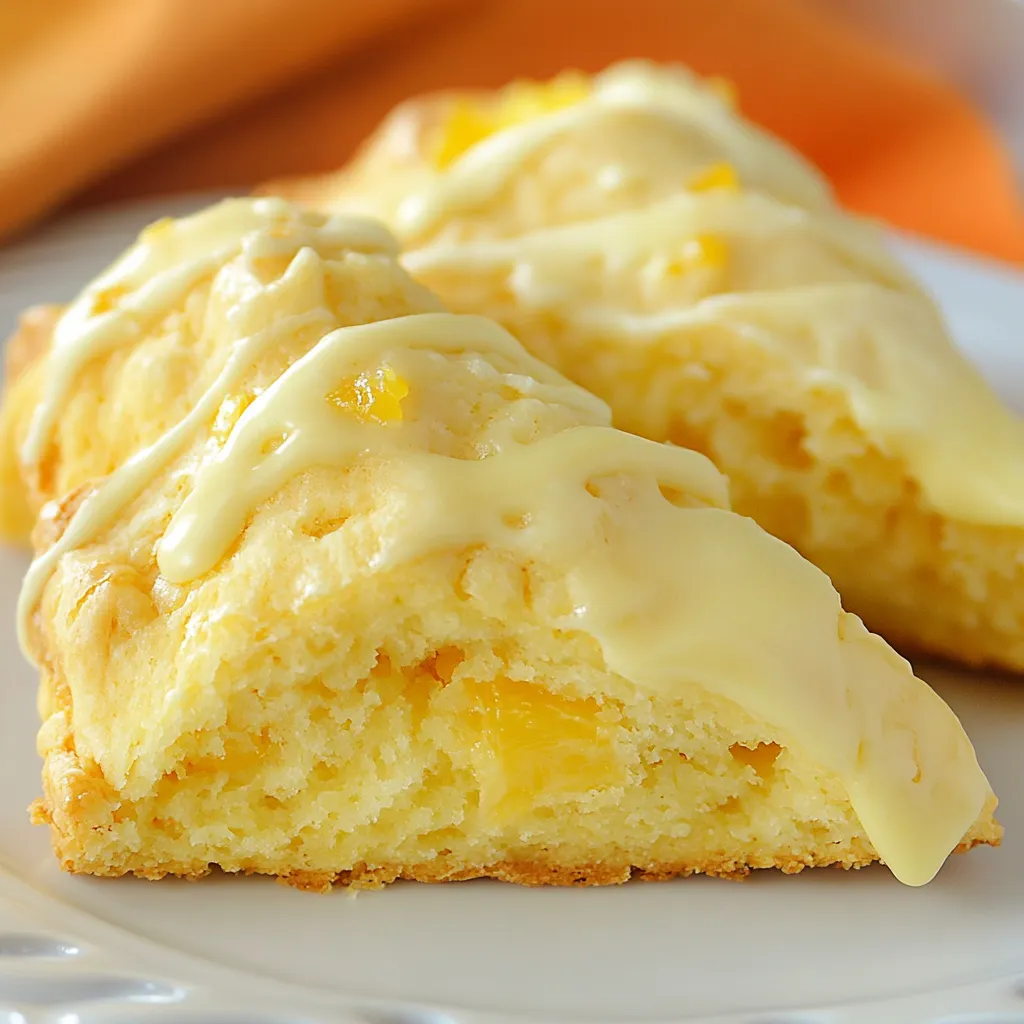

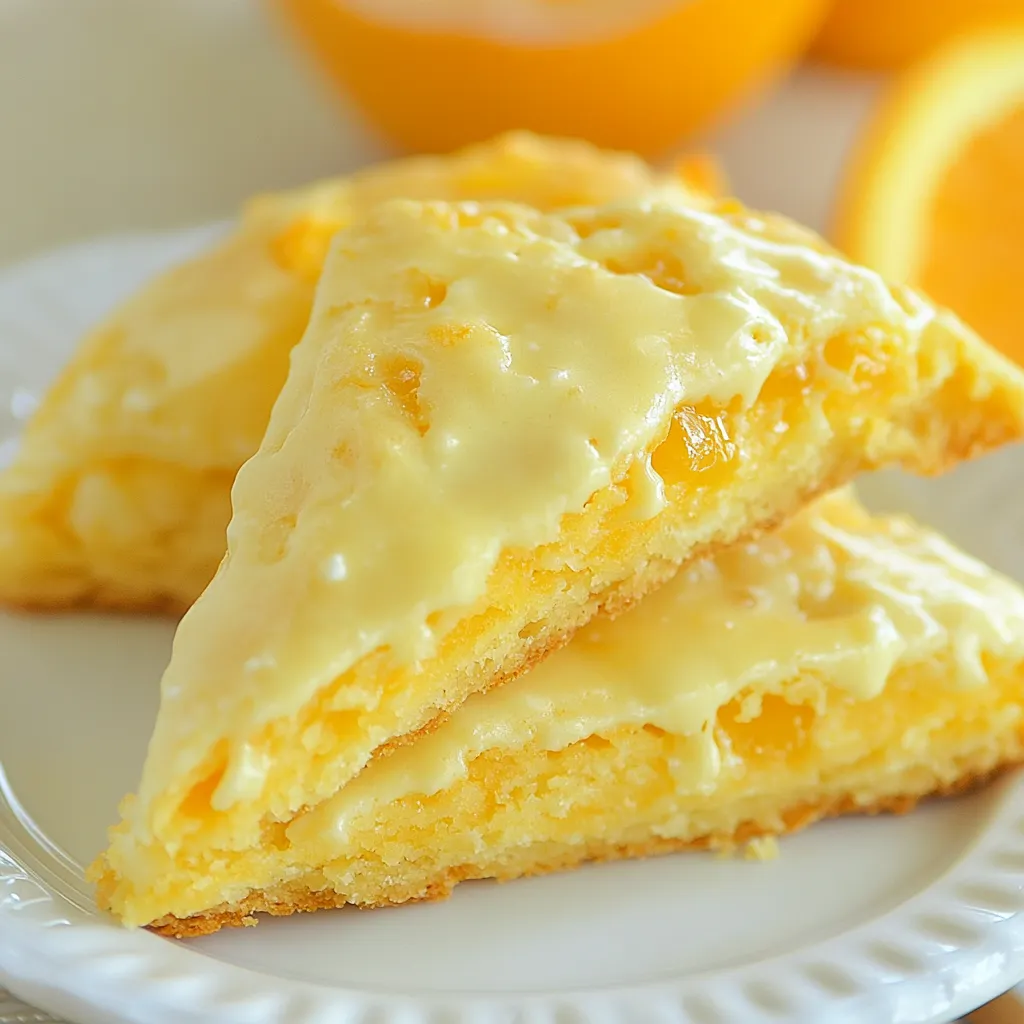
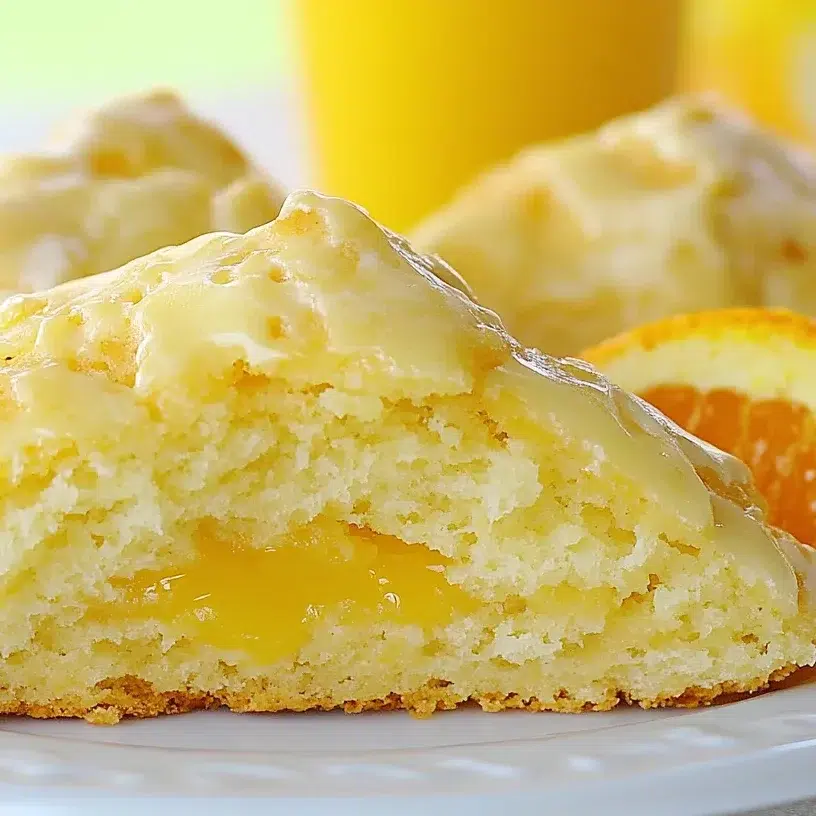
Glazing and Decorating Your Orange Scones
Creating the Perfect Orange Glaze
No Panera orange scone is complete without its signature glaze. The good news? It’s incredibly easy to make. Start by whisking together powdered sugar and fresh orange juice in a small bowl. The juice not only adds flavor but also helps achieve the right consistency. If the glaze is too thick, add a splash more juice. If it’s too thin, sprinkle in a bit more powdered sugar.
For an extra burst of citrus, stir in some finely grated orange zest. This simple addition takes the glaze from good to great, giving it a vibrant flavor that complements the scones perfectly. Once your glaze is smooth and glossy, it’s ready to use.
Creative Decoration Ideas
While a simple drizzle of glaze is classic, there are plenty of ways to get creative with your Panera orange scone recipe. Here are a few ideas to inspire you:
- Candied Orange Peel: For a fancy touch, garnish your scones with thin strips of candied orange peel. Not only do they look beautiful, but they also add a chewy, sweet-tart contrast to the soft scones.
- Coarse Sugar: Before baking, sprinkle the tops of your scones with coarse sugar. This adds a delightful crunch and a touch of sparkle.
- Edible Flowers: If you’re feeling adventurous, try decorating your glazed scones with edible flowers like pansies or violets. They’re sure to impress at brunch or tea parties.
- Chocolate Drizzle: For a decadent twist, drizzle melted white or dark chocolate over the glaze. The combination of citrus and chocolate is simply divine.
Applying the Glaze Like a Pro
Timing is everything when it comes to glazing your scones. Let them cool for about 10 minutes after baking—this ensures the glaze won’t melt and slide off. Use a spoon or a piping bag to drizzle the glaze over the scones in a zigzag pattern. If you prefer a thicker coating, you can dip the tops of the scones directly into the glaze.
Once glazed, allow the scones to set for a few minutes before serving. This gives the glaze time to firm up, creating a beautiful, glossy finish.
Want a sweet treat? Try thess Frozen Biscuits in an Air Fryer. You Won’t Be Disappointed!
Serving and Storing Your Homemade Orange Scones
Best Ways to Serve Panera-Style Orange Scones
Once your Panera orange scones are baked, glazed, and ready to go, it’s time to enjoy them! These scones are incredibly versatile and can be served in a variety of ways. For a classic experience, serve them warm with a pat of butter or a dollop of clotted cream. The richness of the butter or cream pairs beautifully with the bright citrus flavor.
If you’re feeling fancy, add a side of homemade orange marmalade or your favorite jam. The sweet-tart spread enhances the scones’ flavor and adds a lovely contrast in texture. And don’t forget a cup of coffee or tea—these scones are the perfect accompaniment to your morning brew or afternoon pick-me-up.
For a special treat, try serving your scones as part of a brunch spread. Pair them with fresh fruit, yogurt, and a selection of cheeses for a balanced and indulgent meal.
How to Store and Reheat Scones
If you’ve made a big batch of Panera orange scones (and let’s face it, why wouldn’t you?), you’ll want to store them properly to keep them fresh. Here’s how:
- Room Temperature: Store your scones in an airtight container at room temperature for up to 2 days. Place a piece of parchment paper between layers to prevent sticking.
- Refrigerator: For longer storage, you can keep your scones in the fridge for up to 5 days. Just make sure they’re well-wrapped to avoid drying out.
- Freezer: To freeze your scones, wrap them individually in plastic wrap and place them in a freezer-safe bag. They’ll keep for up to 3 months. When you’re ready to enjoy, simply thaw them at room temperature or reheat them in the oven.
Reheating Tips for Freshness
There’s nothing quite like a warm scone, and reheating yours is easy. If you’re using the oven, preheat it to 350°F (175°C) and place the scones on a baking sheet. Heat for 5-10 minutes, or until warmed through. For a quicker option, you can microwave them for 10-15 seconds, but be careful not to overdo it—this can make them soggy.
Pro tip: If your scones have lost a bit of their crispness, pop them in the toaster oven for a few minutes to revive their texture.
Get creative with your bowl of Cinnamon Toast Crunch and milk.
Exploring Variations of the Classic Orange Scone
Lemon-Blueberry Scones: A Citrus Twist
If you love the citrusy flavor of Panera orange scones, why not try a lemon-blueberry version? Simply swap the orange zest and juice for lemon, and fold in a cup of fresh or frozen blueberries into the dough. The tartness of the lemon pairs beautifully with the sweetness of the blueberries, creating a scone that’s bursting with flavor.
For an extra touch, drizzle the baked scones with a lemon glaze made from powdered sugar and lemon juice. This variation is perfect for spring and summer, when fresh berries are at their peak.
Cranberry-Orange Scones for the Holidays
Cranberry-orange scones are a festive twist on the classic Panera orange scone recipe. Add a half cup of dried cranberries to the dough for a sweet-tart contrast that’s perfect for the holiday season. The cranberries’ vibrant red color also makes these scones a beautiful addition to your holiday brunch table.
To enhance the festive vibe, sprinkle the tops with coarse sugar before baking. The result is a scone that’s both delicious and visually stunning.
Savory Options: Cheese and Herb Scones
Who says scones have to be sweet? For a savory take on the Panera orange scone recipe, skip the sugar and citrus, and instead add shredded cheese (like cheddar or Parmesan) and fresh herbs (such as chives or rosemary) to the dough. These savory scones are perfect for serving with soups, salads, or as a standalone snack.
For an extra flavor boost, brush the tops with melted butter and sprinkle with garlic powder before baking. These scones are a great way to switch things up if you’re craving something less sweet.
Experimenting with Different Glazes and Toppings
The glaze is one of the most fun parts of making scones, and there are endless ways to customize it. For example, try adding a splash of vanilla extract or almond extract to the glaze for a subtle flavor twist. You can also mix in a bit of cream cheese for a richer, tangier glaze.
When it comes to toppings, the sky’s the limit. Try sprinkling the scones with chopped nuts, shredded coconut, or even a dusting of cinnamon sugar before baking. These small touches can take your Panera orange scones to the next level.
For another delicious baked treat, check out our GAPS Raisin Muffins Recipe for a wholesome and fruity option.

The Science Behind the Perfect Scone
The Role of Cold Butter in Flaky Texture
One of the secrets to achieving the perfect texture in your Panera orange scones is using cold butter. When cold butter is cut into the flour, it creates small pockets of fat that melt during baking. This process releases steam, which lifts the dough and creates those coveted flaky layers.
To ensure your butter stays cold, work quickly and avoid handling the dough too much. If the butter starts to soften, pop the dough in the fridge for 10-15 minutes before shaping and baking.
How Baking Powder Affects Rise and Fluffiness
Baking powder is the leavening agent that gives scones their rise. When mixed with wet ingredients, it produces carbon dioxide gas, which causes the dough to expand. This is why it’s important to use fresh baking powder—if it’s expired, your scones won’t rise properly.
For the best results, sift the baking powder with the dry ingredients to ensure even distribution. This small step can make a big difference in the final texture of your Panera orange scones.
The Importance of Resting the Dough
Resting the dough might seem like an unnecessary step, but it’s actually crucial for achieving tender scones. When you let the dough rest in the fridge for 15-30 minutes before baking, it allows the gluten to relax. This prevents the scones from becoming tough and ensures a light, crumbly texture.
Resting also gives the butter a chance to firm up again, which helps maintain those flaky layers. So, while it might be tempting to skip this step, trust the process—it’s worth the wait!
FAQs About Making Panera-Style Orange Scones
What is the secret to making good scones?
The secret to making good scones lies in a few key steps: using cold butter, avoiding overmixing the dough, and letting the dough rest before baking. Cold butter creates flaky layers, while gentle mixing ensures a tender crumb. Resting the dough allows the gluten to relax, preventing tough scones.
How much sugar is in a Panera orange scone?
While the exact amount of sugar in a Panera orange scone isn’t publicly disclosed, homemade versions typically use about 1/4 to 1/3 cup of sugar in the dough, plus additional sugar in the glaze. This balances the tartness of the orange and creates a subtly sweet treat.
Can I substitute orange juice for milk in scones?
Yes, you can substitute orange juice for milk in scones, but keep in mind that it will make the dough more acidic and slightly denser. For best results, use a mix of orange juice and a splash of milk or cream to maintain the right texture and richness.
What not to do when making scones?
When making scones, avoid these common mistakes:
- Overmixing the dough, which can make scones tough.
- Using warm butter, as it won’t create flaky layers.
- Skipping the resting step, which helps the dough relax and rise properly.
- Overbaking, which can dry out the scones.
What is the best flour to use for scones?
All-purpose flour is the best choice for scones because it provides the right balance of structure and tenderness. For a slightly lighter texture, you can use pastry flour, but avoid bread flour, as it has too much gluten and can make scones chewy.
What makes scones rise best?
Scones rise best when you use fresh baking powder and handle the dough gently. Baking powder creates air pockets as it reacts with the wet ingredients, while minimal mixing prevents the dough from becoming dense.
Is it better to make scones with butter or oil?
Butter is the preferred fat for scones because it adds flavor and creates flaky layers. Oil can make scones softer but won’t provide the same texture. For the best results, stick with cold butter.
How long should you rest scones before baking?
Resting scones for 15-30 minutes before baking allows the gluten to relax and the butter to firm up again. This step ensures a tender crumb and helps the scones rise evenly in the oven.
Are scones better with milk or water?
Scones are better with milk (or cream) because it adds richness and helps create a tender texture. Water can be used in a pinch, but it won’t provide the same flavor or softness.
Conclusion and Final Thoughts
Why You Should Try This Panera Orange Scone Recipe
Baking your own Panera orange scones at home is more than just a fun kitchen project—it’s a chance to create something truly special. Whether you’re a seasoned baker or a beginner, this recipe is approachable, rewarding, and endlessly customizable. From the zesty orange flavor to the tender, flaky texture, every bite is a reminder of why these scones have become such a beloved treat.
Plus, there’s something incredibly satisfying about serving homemade pastries to family and friends. The smiles on their faces as they take that first bite? Priceless.
Encouragement to Experiment and Have Fun Baking
While this guide provides a tried-and-true Panera orange scone recipe, don’t be afraid to put your own spin on it. Swap out the oranges for lemons, add your favorite mix-ins, or play around with different glazes and toppings. Baking is as much about creativity as it is about following instructions, so let your imagination run wild.
And remember, even if your first batch isn’t perfect, that’s okay. Baking is a learning process, and every mistake is an opportunity to improve. So, roll up your sleeves, preheat your oven, and dive into the world of homemade scones. You might just discover a new favorite recipe—and a newfound love for baking.
Craving something chocolaty instead? Try our indulgent Hot Fudge Brownie Bread for your next dessert.
Final Thoughts
Making Panera orange scones at home is a delightful way to bring a little bit of bakery magic into your kitchen. With this guide, you have all the tools, tips, and inspiration you need to create scones that are just as good—if not better—than the ones you’d buy at Panera. So, what are you waiting for? Grab your ingredients, and let’s get baking!


